Key Takeaways
- Wet room bathrooms provide barrier-free access, modern style, and simplify cleaning, but require professional waterproofing for longevity.
- Demand is rising in both North America and Europe, with strong growth in luxury and accessible renovations.
- Common pitfalls include drainage missteps, inadequate waterproofing, and ongoing maintenance unique to open-plan wet areas.
- What Is a Wet Room Bathroom? Core Concept Explained
- How to Build a Wet Room Bathroom: Step-by-Step Guide
- Advanced Analysis & Common Pitfalls
- Conclusion
- Frequently Asked Questions
What Is a Wet Room Bathroom? Core Concept Explained
A wet room bathroom is a fully waterproofed space where the shower area is level with the floor—no step or enclosure needed. The space functions as an open, accessible, easy-to-clean bathroom, often embraced for both luxury remodels and mobility upgrades. Wet rooms are increasingly seen in urban condos, European homes, and North American renovations, favored for their minimalist look and practical value.
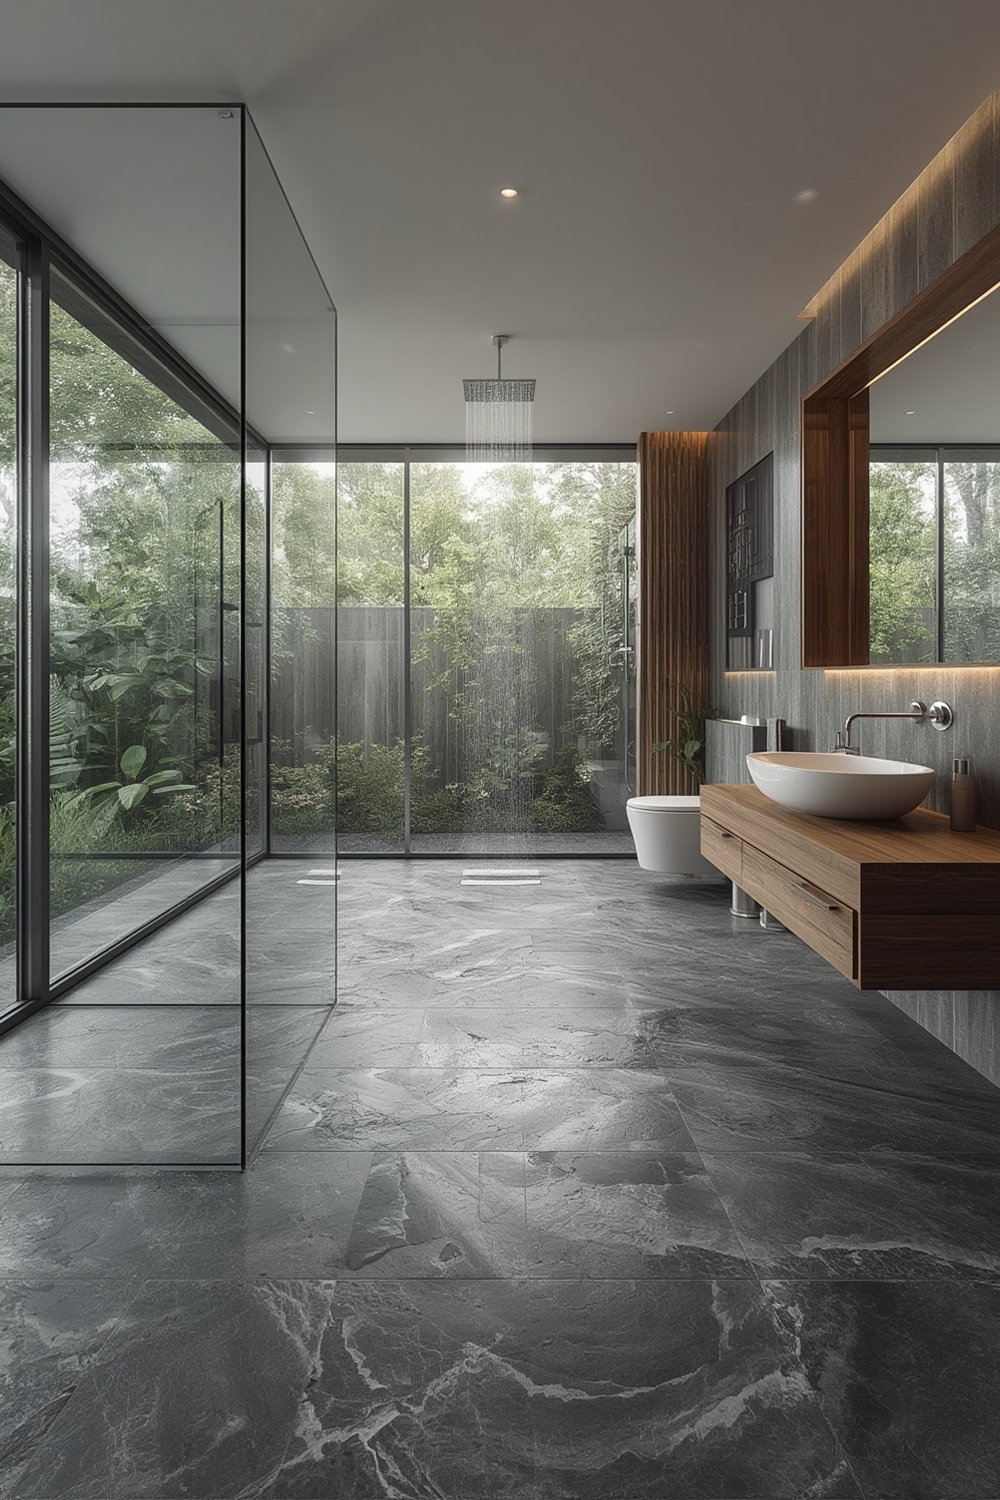
Unlike a traditional shower, the entire floor is tanked (waterproofed) and gently sloped toward a smart drain. This curbless design removes trip points—a critical advantage for anyone with mobility concerns. Demand has surged worldwide, with the global wetroom waterproofing solutions market exceeding $6.7 billion in 2024 and poised for robust growth, especially as cities renovate older bathrooms and as awareness of accessibility spreads.
Updating your bathroom to a wet room brings these benefits:
- Sleek, contemporary appearance—ideal for small or urban spaces
- Easier cleaning with fewer joints and glass walls
- Full wheelchair and mobility aid access
- Highly adaptable for luxurious features such as rain showers or floor heating
However, a wet room bathroom demands rigorous waterproofing and professional installation—shortcuts can lead to leaks, structural damage, and costly repairs. This guide walks you through the essentials and the actionable steps for a successful upgrade.
How to Build a Wet Room Bathroom: Step-by-Step Guide
Designing and installing a wet room bathroom takes careful planning. Here’s how to approach the project for lasting results.
- Assess Feasibility and Existing Structure
- Check that your floor joists and substructure can support changes in drainage and waterproofing
- Locate existing plumbing—modifying waste lines can be complex in slab-on-grade or multistory buildings
- Ensure adequate ventilation for moisture control
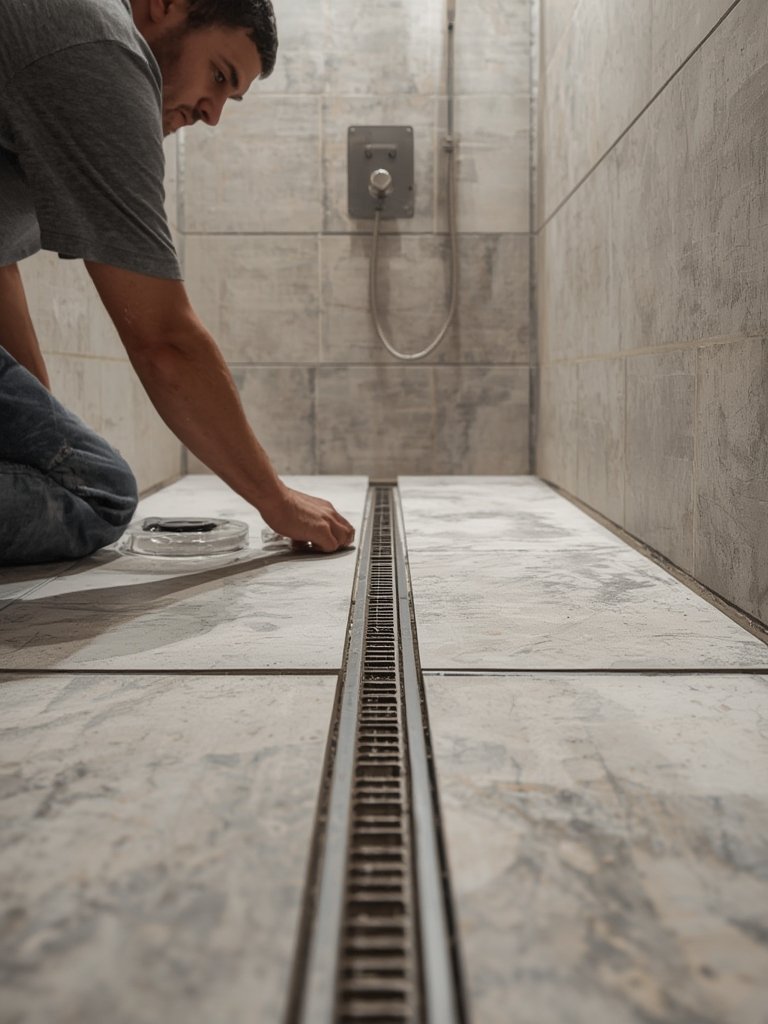
- Plan Drainage Slope and Drain Type
- Wet rooms need a continuous, subtle floor slope—ideally 1.5 to 2% toward the main drain
- Linear drain systems are popular for contemporary style and easier wheelchair access; center point drains work for smaller spaces
- Check all choices against local building codes
- Full-Room Waterproofing
- Install a tanking membrane (sheet or liquid applied) across the entire floor and at least 12 inches up all walls
- Reinforce wall-floor junctions, corners, and pipe penetrations
- Some modern membranes also provide crack isolation for older concrete or wood subfloors
- Install Drainage and Plumbing
- Set and securely connect the drain base flush to the finished floor level
- Slope the floor substrate (usually cement board or preformed tray) carefully—avoid flat spots where water can pool
- Test all plumbing connections before final waterproofing and tiling
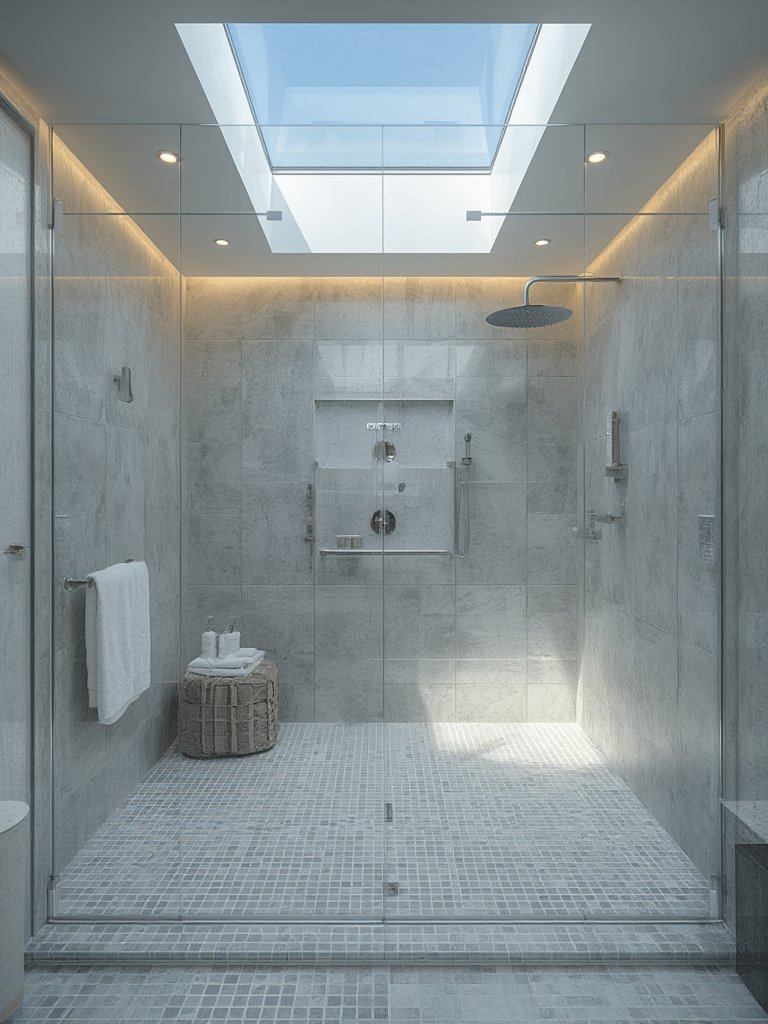
- Finish with Water-Resistant Surfaces
- Use nonporous tile, seamless vinyl, or resin flooring designed specifically for wet rooms
- Grout with waterproof epoxy for long-term durability
- Consider integrating underfloor heating—reduces slip risk and enhances comfort
- Accessibility & Safety Upgrades (Optional)
- Install grab bars, wall-mounted shower seats, and lever mixers for universal access
- Verify compliance with ADA or local accessibility standards if needed
- Choose slip-resistant flooring materials in the shower area
For energy efficient upgrades, pairing your wet room with a heat pump water heater reaps additional savings on water heating while supporting comfort. Also, if your wet room is part of a laundry/bath zone, a ventless washer dryer can save space without external venting.
To reduce echoes and humidity-related noise, consider the impact of materials—integrating acoustic fluted panels or adding washable rugs designed for wet environments can help protect adjoining spaces.
Advanced Analysis & Common Pitfalls
Wet room bathrooms offer both style and function but present real challenges if not executed properly. Here are typical issues and how to overcome them:
| Common Issue | Impact | How to Avoid |
|---|---|---|
| Poor Waterproofing | Leaks, mold, structural water damage | Use professional-grade membranes. Overlap and seal all seams. Test before tiling. |
| Insufficient Drainage Slope | Water pooling, slip hazard, grout deterioration | Slope floor at least 1.5% toward drain; verify with a level at each step. |
| Improper Material Use | Tile lifting, grout staining, persistent odors | Choose tile, grout, and boards rated for constant wet area use. Avoid standard drywall. |
| Overlooked Maintenance | Drain blockages, buildup, discoloration | Use removable drain covers. Clean weekly. Opt for easy-clean wall panels if desired. |
| Accessibility Not Fully Considered | Not usable for all mobility devices | Design clear turning space and install accessible hardware from the outset. |
Other pitfalls include not planning enough for daily usage: European-style wet rooms sometimes lead to excess water splash, requiring more frequent floor and wall drying (washable rugs can help, with tips here). In retrofit situations, routing new drains is often the costliest and most time-intensive step.
Innovations in waterproofing technology are rapidly advancing. As of 2024, the trend is toward membrane systems that integrate crack isolation and signal any water intrusion early, driving market growth according to industry research. Always consult the latest local codes and choose products certified for wet room use.
If you want the ultimate in waterproof floor durability and easy maintenance, consider supplementing with SPC flooring (Stone Plastic Composite) outside the main wet zone.
Conclusion
A successful wet room bathroom blends style, maximum function, and modern accessibility—but only with methodical waterproofing and a focus on maintenance. The market signals clear growth and ongoing innovation, opening the door for luxury updates and happier daily routines. If you want a home upgrade that’s both beautiful and practical, investing in a wet room bathroom is a smart, future-proof choice. Ready to take the next step? Start planning your barrier-free, easy-clean space today, and consult a professional to ensure your vision becomes a leak-proof reality.
Frequently Asked Questions
What is the average cost of installing a wet room bathroom?
Costs vary based on region and existing structures, but a wet room bathroom typically starts around $12,000 to $25,000 in North America, with higher costs reflecting labor, waterproofing, and drainage adaptations. Traditional remodels are often $2,000 to $5,000 less, but lack the same accessibility features.
Are wet room bathrooms ADA compliant?
When designed with the correct turning space, grab bars, bench options, and proper floor slopes, wet room bathrooms can be made ADA compliant. Always reference local codes or consult an accessibility specialist during the design phase.
Do wet room bathrooms require special maintenance?
Maintenance is straightforward but essential. Regularly clean drains, wipe walls, and check for grout integrity. Unique to wet rooms, you must watch for standing water and ensure nothing impedes drainage grates.
Can wet room bathrooms be installed upstairs?
Yes—with proper structural reinforcement and high-quality waterproofing, wet room bathrooms can be installed on any floor. However, the complexity and cost are higher than ground-level installations due to extra precautions required.
How do I prevent water from getting everywhere in a wet room?
Use adequate floor slope, install a powerful and accessible drain, and consider partial glass screens to contain spray. Slip-resistant flooring and regular drying help maintain safe, manageable surfaces.